Installation Instructions
Soviet-Linux is not suitable for daily use. However, you can test it by following the instructions below.
Downloading the image
Firstly download a testing iso from #testing-releases on our discord server
1. Installing it on baremetal
Prerequisites
- A USB drive
- A X86_64 computer
Prepare Installation Media
The dd command can be used to copy a live image to a storage device. Using dd, write the live image to the device:
Warning: this will destroy any data currently on the referenced device. Exercise caution.
$ dd bs=4M if=/path/to/sovietlinux-<DATE>-installation.img of=/dev/sdX
dd won’t print anything until it’s completed (or if it failed), so, depending on the device, this can take a few minutes or longer. You can enable printing by adding status=progress to the command.
Finally, ensure all data is flushed before disconnecting the device:
$ sync
Booting up from the USB
Boot your machine from the install media you created.
Once the live image has booted, log in as root with password sovietlinux and run:
$ /etc/soviet-install.sh /dev/sdX # Target drive
Then after a reboot you should be good to go with your new Soviet-powered PC
2. Trying it out on VM
Step 1: Create a New Virtual Machine
Create a new virtual machine using the previously downloaded image.
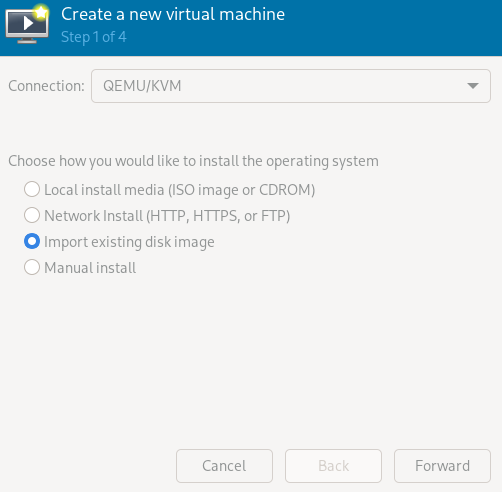 Select your Soviet image and set the OS to
 Generic Linux 2022.
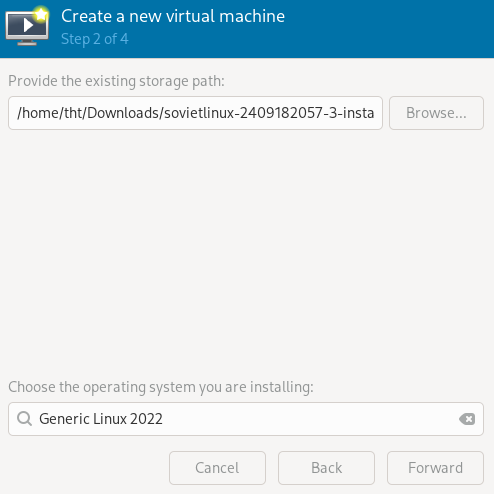
Step 2: Configure Resources
Configure the resources for your virtual machine. We recommend allocating at least 4 gigabytes of RAM and 2 cores.
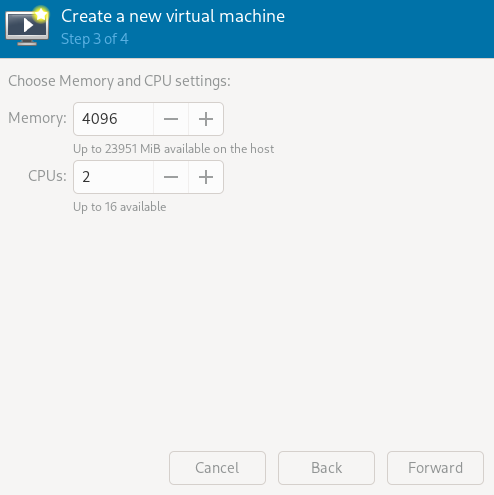
Step 3: Name Your VM and Customize Configuration
Name your virtual machine and make sure to select Customize configuration before install. This is crucial for the installation to work.
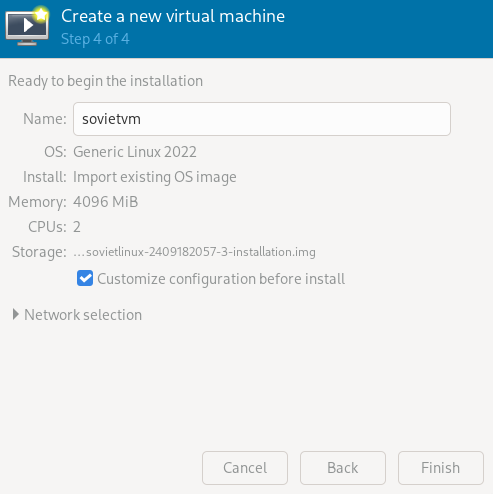
Step 4: Delete the existing drives
Set the Firmware to UEFI and click apply. Delete the existing drives.
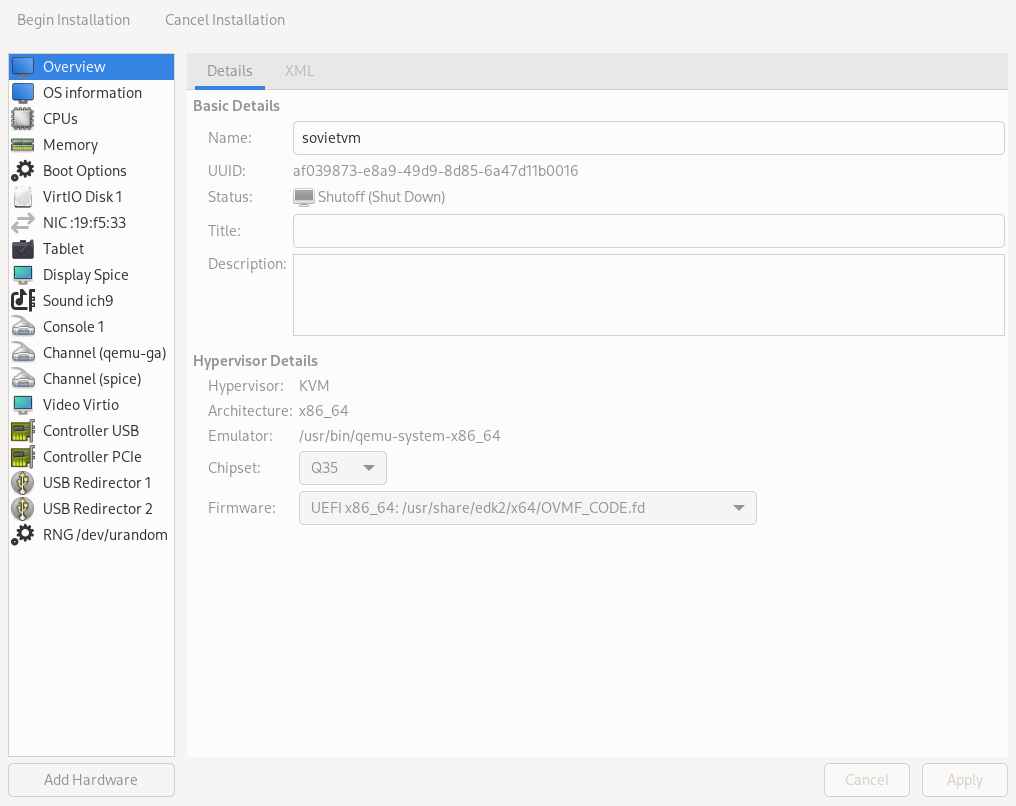
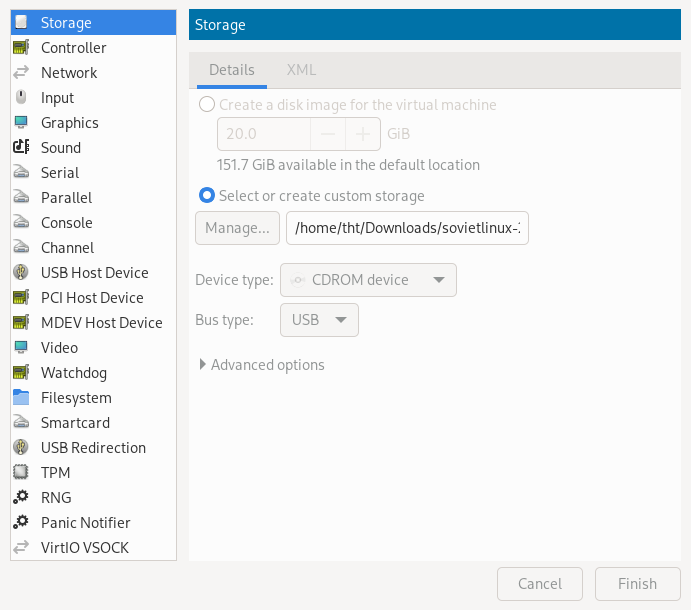
Step 5: Create CD Drive
Create the root drive for the Soviet installation. Make sure to use virtIO, as the installation may not work without them.
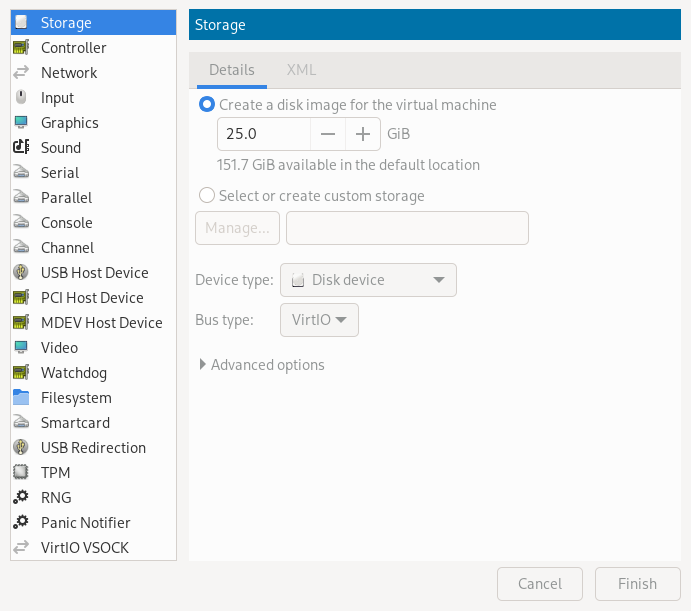
Step 6: Create Root Drive
Create the root drive for the Soviet installation. Make sure to use virtIO, as the installation may not work without them.
Step 7: Set CDROM as boot device
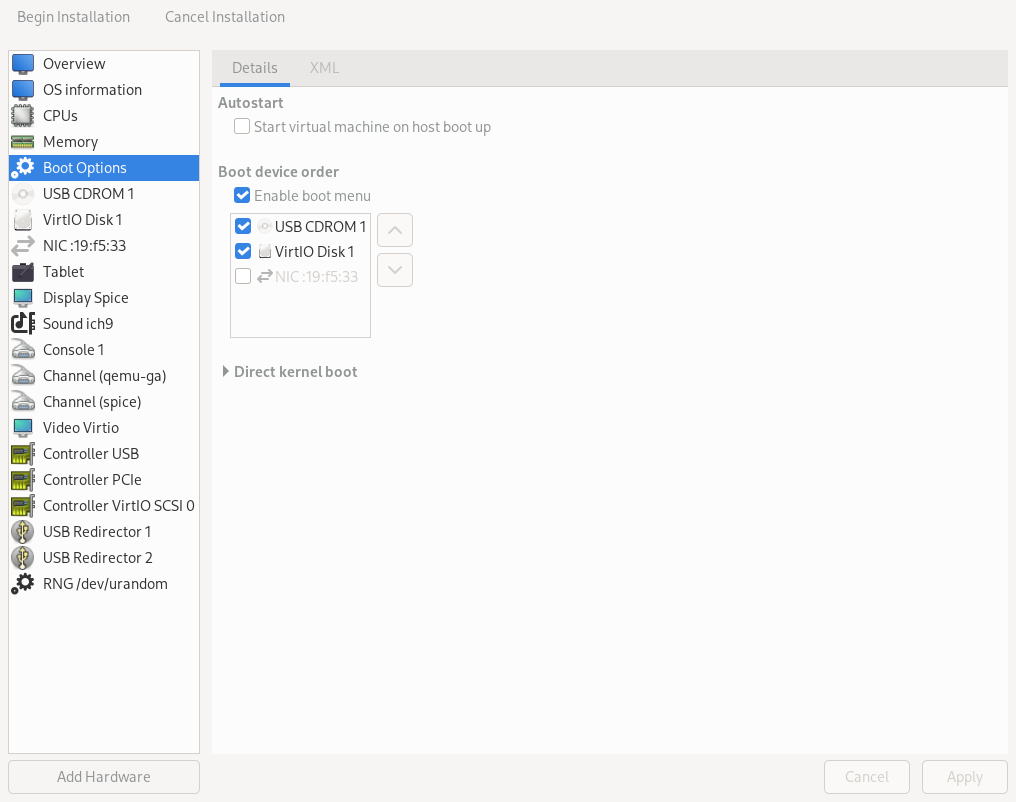
Step 7: Begin Installation
Boot from the installation image. Log in as root with the password sovietlinux and run the following command:
$ /etc/soviet-install.sh /dev/vdb
This command should typically point to /dev/vdb, assuming you followed the tutorial.
Step 8: Shut Down and Reboot
Shut down the virtual machine and ensure that the virtIO drive is at the top.
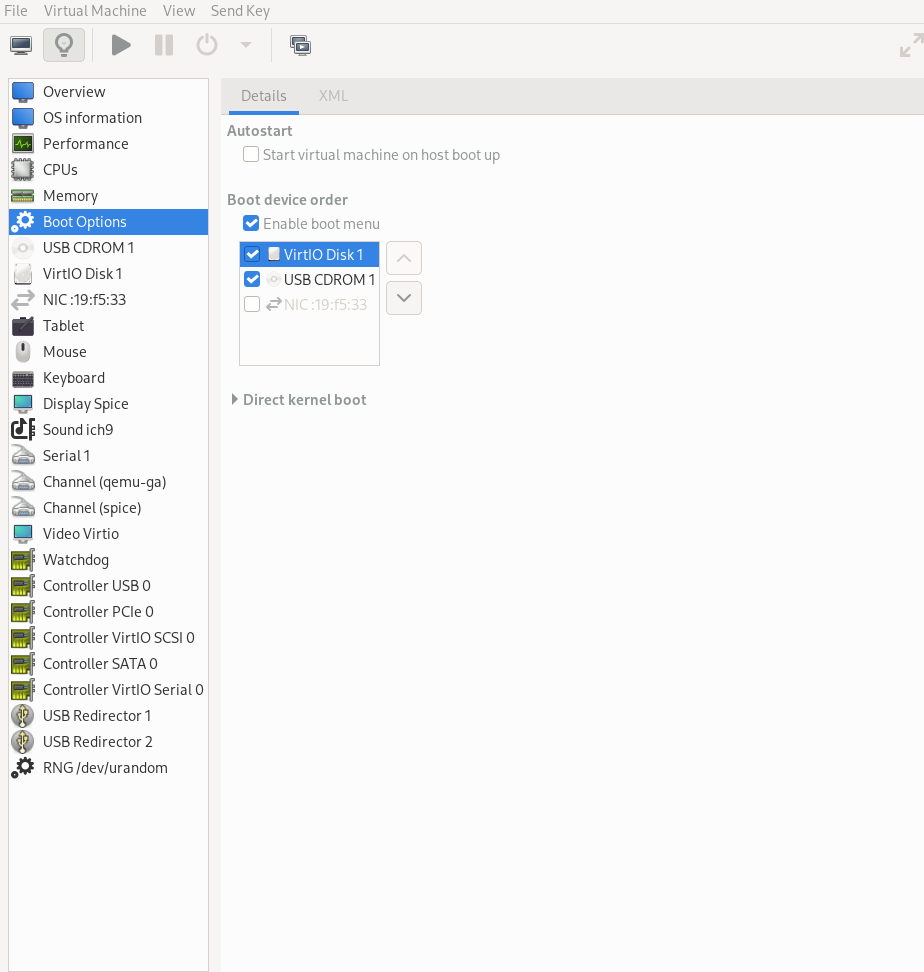 Then, reboot the VM.
NOTE: It doesn’t actually delete the .efi file for the installer, so on first boot you’ll have two options.
You want the *-initrd.efi one, the other can be deleted/ignored.
It should now boot into your new Soviet installation.